Penny Floor Mosaic
This is a project we completed back in 2010. I get emails EVERY day from people who were inspired to make their own pennies floors even!
Thank you to EVERYONE for all the wonderful comments, emails, and photos of your own creations. I really appreciate it! Please forgive me if it takes me a while to respond to emails.
Please come over and follow me on Facebook! Thank you!
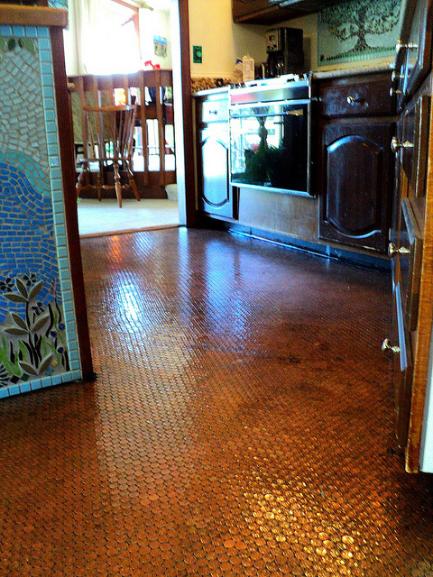
This is the installation I get asked them most about. The idea came about one afternoon while talking to my husband about covering our living-room walls in copper sheeting. We joked that it would be cheaper to cover it in pennies. That joke lead to a conversation about what we could cover in pennies... because it was just too cool of an idea not to! We had been wanting to redo our kitchen floor for a long time, but funds & a lack of really good ideas had prevented us from doing so. Within 5 minutes, we decided that it would be my newest project, and I couldn't wait to run out and get some rolls of pennies & start!
This small section contains 5000 pennies.
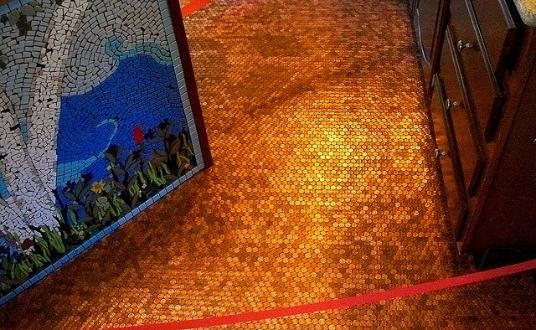
I worked in sections, blocking off my understanding family & pets, until the glue on each penny dried. You can head to my "gallery" page to see the finished mosaic in the photo as well!
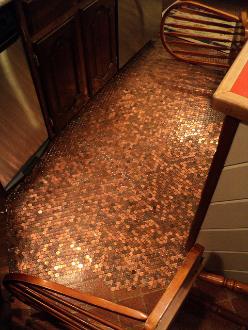
I generally got $20 worth of pennies at a time from the bank. I worked on the penny floor for about a year... on weekends, rainy days, and here and there between raising a family, and working full time as a mosaic artist. I used Weldbond Glue to adhere each penny, individually, to my floor. ALL wax was removed from the floor before I started. To be just a little crazy, I made each penny heads up & facing the same direction. Here and there, I would throw in a dime.... and when I found a cool penny (like a wheat penny), I put them tails up. It gave everyone something to look for. :) As I finished a section, I grouted them. I used a black, sanded grout. This kept dirt from finding it's way into the cracks, and I think gives it a really finished look.

Grouted, and waiting for sealant!
I didn't start to seal the floor until I was almost done. I wanted the sealant to have a smooth, consistent look. I went off to the hardware store and picked up a polyurethane floor sealant.. the same kind you would use to seal any other kind of floor. Using a wool brush, I applied 3 coats. It protects the floor, protects the pennies, and makes it as easy to clean as any other floor.

In total, there are approximately 31,140 pennies. We're thrilled with how it came out, and would LOVE to see any photos of your penny or coin creations if you decide to tackle a similar project! To read an article that appeared in the Portland Press Herald, about our floor, please click here.
© All rights reserved
Amanda Edwards 2011